個人Blog採用靜態Blog形式託管在[Github][github]上。此前使用的是[Hexo][hexo],因其包依賴關係複雜,部署流程繁瑣,故將整個部署環境封裝到Docker鏡像中以實現快速部署,但仍較爲繁瑣。現轉用執行速度快、操作簡便的[Hugo][hugo]。本文記錄如何在GNU/Linux中通過[Travis CI][travisci]將[Hugo][hugo]生成的Blog內容自動同步到[Github][github],實現持續集成、部署。
官方文檔
本文中的相關操作皆以官方文檔爲操作依據
- Github
- Hugo
- Travis CI
- [GitHub Pages Deployment][travisci-github-page]
- Building a Python Project
- Best Practices in Securing Your Data
- Customizing the Build
GitHub Pages 限制
GitHub Pages is a static site hosting service designed to host your personal, organization, or project pages directly from a GitHub repository.
GitHub Pages 站點在使用上有如下限制:
- 倉庫大小不得超過1GB;
- 生成的 GitHub Pages 站點大小不得超過1 GB;
- GitHub Pages 站點每月限 100 GB 流量;
- GitHub Pages 站點每小時限構建10次;
更多介紹見官方文檔 『What is GitHub Pages?』。
準備工作
- 在[Github][github]註冊帳號;
- 在[Travis CI][travisci]註冊帳號(可通過Github帳號登入);
- 本地系統安裝
git,hugo; - 個人域名(可選,此處指定域名
axdlog.com);
安裝 Hugo
- Github 地址: https://github.com/gohugoio/hugo
- 下載頁: https://github.com/gohugoio/hugo/releases
- 版本信息API: https://api.github.com/repos/gohugoio/hugo/releases/latest
hugo官方的安裝文檔頁Install Hugo,如果使用GNU/Linux,可考慮使用本人寫的Python腳本進行快速安裝。
查看版本信息
# which hugo
/usr/local/bin/hugo

# hugo version
Hugo Static Site Generator v0.55.5-A83256B9 linux/amd64 BuildDate: 2019-05-02T13:03:36Z
Python Script
這個Python腳本用於安裝或升級 GNU/Linux 中的Hugo。
操作過程
$ sudo python3 ~/hugo.py
uccessfully download pack /tmp/hugo_0.55.4_Linux-64bit.tar.gz!
Successfully install Hugo v0.55.4!

Symlink info:
lrwxrwxrwx 1 root root 14 Apr 26 12:26 /usr/local/bin/hugo -> /opt/Hugo/hugo

Hugo info:
Hugo Static Site Generator v0.55.4-57900417 linux/amd64 BuildDate: 2019-04-25T07:38:50Z

$ sudo python3 ~/hugo.py
Latest version 0.55.4 existed.

Hugo info:
Hugo Static Site Generator v0.55.4-57900417 linux/amd64 BuildDate: 2019-04-25T07:38:50Z


# update operation
$ sudo python3 hugo.py
Local version 0.55.4 < latest version 0.55.5.
Successfully download pack /tmp/hugo_0.55.5_Linux-64bit.tar.gz!
Successfully install Hugo v0.55.5!

Symlink info:
lrwxrwxrwx 1 root root 14 May  2 11:21 /usr/local/bin/hugo -> /opt/Hugo/hugo

Hugo info:
Hugo Static Site Generator v0.55.5-A83256B9 linux/amd64 BuildDate: 2019-05-02T13:03:36Z
創建新項目
如何通過[Hugo][hugo]創建一個新的站點,詳見官方文檔 Get Started、Quick Start。
If this is your first time using Hugo and you’ve already installed Hugo on your machine, we recommend the quick start.
此處且將站點名稱命名爲quickstart(其實就是目錄名,不一定是最終的網站名稱)。
hugo new site quickstart
Hugo生成的目錄結構如下
# tree -L 2
├── archetypes
│   └── default.md
├── config.toml
├── content
├── data
├── layouts
├── static
└── themes

6 directories, 2 files
注意:這些不是最終的Blog內容,是用於生成Blog內容的文件。
目錄content中存放自己需要發佈的Blog (Markdown文件);
如果要預覽Blog最終效果,可通過命令hugo server在本地開啓一個Web服務器,端口號1313,在瀏覽器中打開即可。
Web Server is available at http://localhost:1313/ (bind address 127.0.0.1)
Press Ctrl+C to stop
在項目所在目錄中執行命令hugo,會生成名爲public的目錄,該目錄存放着最終的Blog內容文件。將public目錄中的所有內容上傳至Github的master分支中即可。
演示過程如下
# hugo

                   | EN
+------------------+-----+
  Pages            | 426
  Paginator pages  |  24
  Non-page files   |   0
  Static files     |  34
  Processed images |   0
  Aliases          |  95
  Sitemaps         |   1
  Cleaned          |   0

Total in 403 ms

# tree -L 1
.
├── archetypes
├── config.toml
├── content
├── data
├── layouts
├── public
├── resources
├── static
└── themes

8 directories, 1 file
配置 Github 倉庫
注意:本部分的處理思路、操作非常重要,Git配置步驟省略。Git的使用見官方文檔 『GitHub Help』、『Git Cheat Sheets』。
使用GitHub Pages託管Blog內容,需要創建名爲<username>.github.io的倉庫,並將Hugo生成的Blog內容提交到倉庫的master中。
因Hugo生成的內容分爲兩部分,源文件和public目錄中的Blog內容。故通過git checkout --orphan在同一倉庫中創建2個分支:
- 分支
code用於存放源文件; - 分支
master用於存放public目錄中的Blog內容;
處理思路與官方文檔 Configuring a publishing source for GitHub Pages不同,需要注意。
創建空倉庫
本人GitHub帳號名爲MaxdSre,故創建倉庫maxdsre.github.io。
創建倉庫後,出現如下提示信息
or create a new repository on the command line
echo "# maxdsre.github.io" >> README.md
git init
git add README.md
git commit -m "first commit"
git remote add origin git@github.com:MaxdSre/maxdsre.github.io.git
git push -u origin master
or push an existing repository from the command line
git remote add origin git@github.com:MaxdSre/maxdsre.github.io.git
git push -u origin master
分支操作
操作分爲4步:
- 初始化Git倉庫(
git init); - 創建
code分支,提交源文件代碼到倉庫; - 在目標目錄中執行
hugo生成public目錄,將public目錄中內容轉移到臨時目錄中, 清空目標目錄,將臨時目錄中文件複製到該目錄中; - 通過命令
git checkout --orphan創建master分支,將目錄中內容提交到倉庫。
進入目標目錄(此處爲/PATH/quickstart/)後,順序執行如下操作命令
code 分支
# Initialized empty Git repository in /PATH/.git/
git init

# Switched to a new branch 'code', equal to 'git branch code && git checkout code'
git checkout -b code

# exclude dir public/
echo '/public/' >> .gitignore
sed -r -i '/^\/public\/$/{$!d}' .gitignore

# Add file contents to the index
git add .

# Show the working tree status
# git status

# Record changes to the repository
git commit -m "Hugo generator code"

# Manage set of tracked repositories
git remote add origin git@github.com:MaxdSre/maxdsre.github.io.git

# Update remote refs along with associated objects to branch 'code'
git push -u origin code
master 分支
在目錄中執行hugo生成public目錄。通過命令git branch -a可查看倉庫的分支信息。
# execute command hugo
hugo

# create temporary dir
HUGO_TEMP_DIR=$(mktemp -d)
cp -R public/* "$HUGO_TEMP_DIR"

# create orphan branch 'master'
git checkout --orphan master

# empty current dir
rm .git/index
git clean -fdx

# copy back contents in dir public/
cp -R "$HUGO_TEMP_DIR"/. .

# add, commit, push
git add .
# git status
git commit -m 'initial blog content'
git push -u origin master

# remove temp dir
[[ -d "$HUGO_TEMP_DIR" ]] && rm -rf "$HUGO_TEMP_DIR"
image 分支
此操作爲可選操作,本人創建第3個分支image用作圖牀,本文中的圖片即存放在該分支中。
注:[GitHub][github]每個倉庫可使用 1 GB 存儲空間,單個文件大小不超過 100 MB,詳見官方文檔 『File and repository size limitations』。
git checkout --orphan image
rm .git/index
git clean -fdx

# add content to this branch

git add .
git commit -m 'initial blog images'
git push -u origin image

# fatal: The current branch image has no upstream branch.
# To push the current branch and set the remote as upstream, use
# git push --set-upstream origin image
切換分支
如果要將本地分支切換到遠程分支remotes/origin/image,可通過如下命令實現
# git checkout -b <branch> --track <remote>/<branch>
# -b <new_branch>    Create a new branch named <new_branch> and start it at <start_point>;
# -t, --track     When creating a new branch, set up "upstream" configuration.

git checkout -t remotes/origin/image

# 本地分支,從其它分支切換到本地分支code
git checkout code
演示過程如下
$ git branch
* code

$ git branch -a
* code
  remotes/origin/HEAD -> origin/code
  remotes/origin/code
  remotes/origin/image
  remotes/origin/master

$ git checkout -t remotes/origin/image
Branch 'image' set up to track remote branch 'image' from 'origin'.
  Switched to a new branch 'image'

$ git branch
  code
* image

$ git branch -a
  code
* image
  remotes/origin/HEAD -> origin/code
  remotes/origin/code
  remotes/origin/image
  remotes/origin/master
此處遠程默認分支爲code,如果需要更改爲master,執行如下命令
# change HEAD from origin/code to origin/master
git remote set-head origin master
刪除分支
可分爲刪除遠程分支、本地分支、追蹤分支三種情況,具體見How do I delete a Git branch both locally and remotely?。
# 1 - 刪除遠程分支
$ git push origin --delete <branch> # Git version 1.7.0 or newer
$ git push origin :<branch> # Git versions older than 1.7.0

# 2 - 刪除本地分支
$ git branch --delete <branch>
$ git branch -d <branch> # Shorter version

$ git branch -D <branch> # Force delete un-merged branches

# error: The branch 'image' is not fully merged.
# If you are sure you want to delete it, run 'git branch -D image'.

# 3 - 刪除本地追蹤分支
$ git branch --delete --remotes <remote>/<branch>
$ git branch -dr <remote>/<branch> # Shorter

$ git fetch <remote> --prune # Delete multiple obsolete tracking branches
$ git fetch <remote> -p # Shorter
Travis CI 配置
[Travis CI][travisci]官方說明文檔 [GitHub Pages Deployment][travisci-github-page]。
生成 Github 訪問 Token
You’ll need to generate a personal access token with the public_repo or repo scope (repo is required for private repositories). Since the token should be private, you’ll want to pass it to Travis securely in your repository settings or via encrypted variables in .travis.yml.
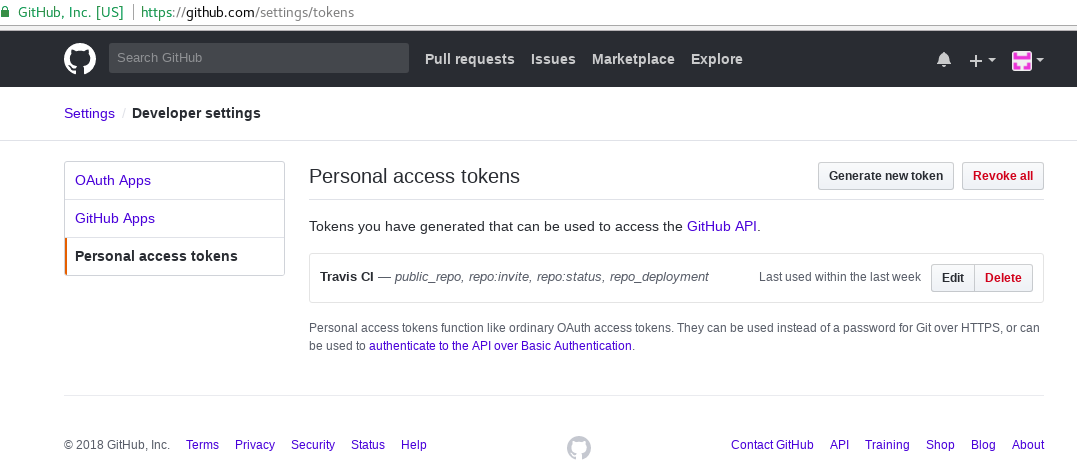
在Github的Developer settings頁面中生成personal access tokens,若是私有倉庫,勾選repo;若是公開倉庫,勾選public_repo。此處本人選擇了 public_repo, repo:status, repo_deployment三項。
生成的是長度爲40的隨機字符串,注意請勿泄漏。
設置環境變量
生成的token須在[Travis CI][travisci]的目標Repo中設置,頁面地址爲 https://travis-ci.org/MaxdSre/maxdsre.github.io/settings。
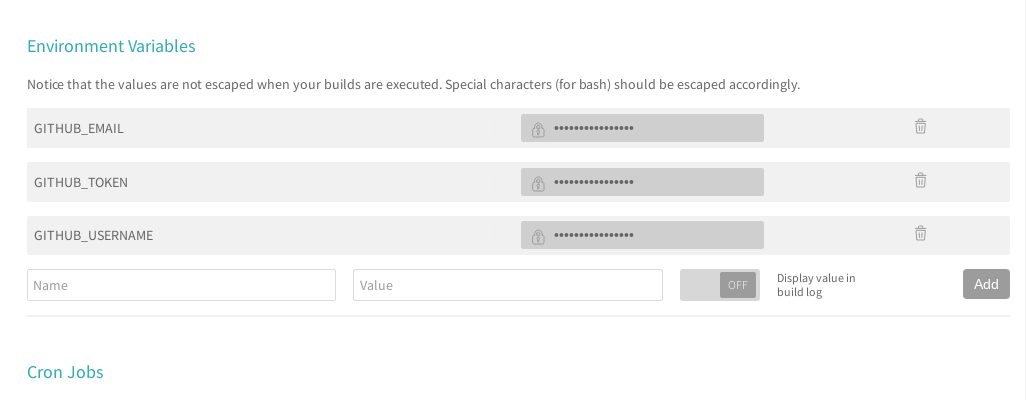
確保General中的Build only if .travis.yml is present, Build pushed branches, Build pushed pull requests已啓用。
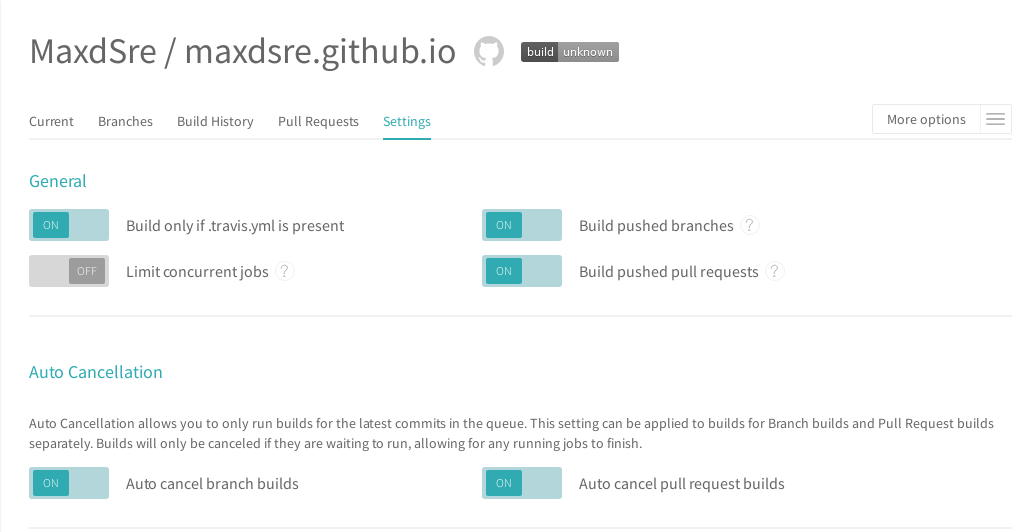
官方文檔[GitHub Pages Deployment][travisci-github-page]定義的默認token名爲GITHUB_TOKEN,其它指令詳見文檔。
Notice that the values are not escaped when your builds are executed. Special characters (for bash) should be escaped accordingly.
此處定義相關變量,稍後會寫入.travis.yml文件。
| Environment Variables | Value |
|---|---|
| CNAME_URL | axdlog.com |
| GITHUB_USERNAME | MaxdSre |
| GITHUB_EMAIL | admin@axdlog.com (假設值) |
| GITHUB_TOKEN | 75e8b72618ebf48df0b235cp4affd79e167b2489 (假設值) |
.travis.yml 指令
[Hugo][hugo]是用Golang構建的,如果在.travis.yml中使用language: go,[Travis CI][travisci]構建Golang環境耗時太長(數分鐘)。
看到他人教程中有用Python的,恰巧最近在學習Python,便選擇Python做爲構建環境。因[Travis CI][travisci]的容器環境是基於Ubuntu的,故可以使用。dpkg、apt-get等命令,但需要添加sudo
使用Python經常出現構建失敗的情況,原因是GitHub禁止Travis容器的HTTP請求,通過tor代理解決。
最終指令如下
Python
# https://docs.travis-ci.com/user/deployment/pages/
# https://docs.travis-ci.com/user/reference/xenial/
# https://docs.travis-ci.com/user/languages/python/
# https://docs.travis-ci.com/user/customizing-the-build/

dist: xenial
language: python
python:
  - "3.7"

before_install:
  - sudo apt-get update -qq
  - sudo apt-get -yq install apt-transport-https tor curl

# install - install any dependencies required
install:
    # install latest release version
    # Github may forbid request from travis container, so use tor proxy
    - sudo systemctl start tor
    # - curl -fsL --socks5-hostname 127.0.0.1:9050 https://api.github.com/repos/gohugoio/hugo/releases/latest | sed -r -n '/browser_download_url/{/Linux-64bit.deb/{s@[^:]*:[[:space:]]*"([^"]*)".*@\1@g;p;q}}' | xargs wget
    - download_command='curl -fsSL -x socks5h://127.0.0.1:9050' # --socks5-hostname
    - $download_command -O $($download_command https://api.github.com/repos/gohugoio/hugo/releases/latest | sed -r -n '/browser_download_url/{/Linux-64bit.deb/{s@[^:]*:[[:space:]]*"([^"]*)".*@\1@g;p;q}}')
    - sudo dpkg -i hugo*.deb
    - rm -rf public 2> /dev/null

# script - run the build script
script:
    - hugo 2> /dev/null
    - echo "$CNAME_URL" > public/CNAME

deploy:
  provider: pages
  skip-cleanup: true
  github-token: $GITHUB_TOKEN  # Set in travis-ci.org dashboard, marked secure
  email: $GITHUB_EMAIL
  name: $GITHUB_USERNAME
  verbose: true
  keep-history: true
  local-dir: public
  target_branch: master  # branch contains blog content
  on:
    branch: code  # branch contains Hugo generator code
Golang (deprecated)
# https://docs.travis-ci.com/user/deployment/pages/
# https://docs.travis-ci.com/user/reference/xenial/
# https://docs.travis-ci.com/user/languages/go/
# https://docs.travis-ci.com/user/customizing-the-build/

dist: xenial
language: go
go:
    - master

# before_install
# install - install any dependencies required
install:
    - go get github.com/gohugoio/hugo    # consume time 70.85s

before_script:
    - rm -rf public 2> /dev/null

# script - run the build script
script:
    - hugo 2> /dev/null
    - echo "$CNAME_URL" > public/CNAME

deploy:
  provider: pages
  skip-cleanup: true
  github-token: $GITHUB_TOKEN  # Set in travis-ci.org dashboard, marked secure
  email: $GITHUB_EMAIL
  name: $GITHUB_USERNAME
  verbose: true
  keep-history: true
  local-dir: public
  target_branch: master  # branch contains blog content
  on:
    branch: code  # branch contains Hugo generator code
將指令寫入到文件.travis.yml中,並將該.travis.yml上傳至repo的code分支中。
持續集成
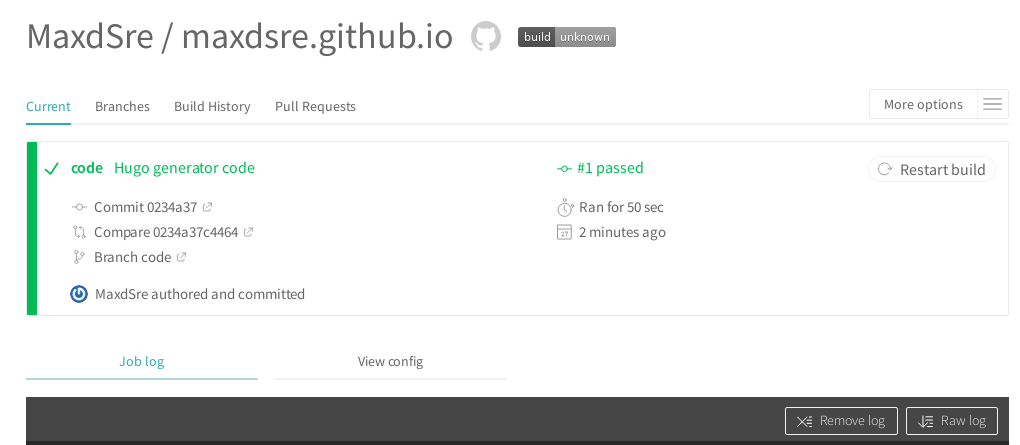
所有操作完成後,只需將需要發佈的Blog上傳到repo的code分支中,[Travis CI][travisci]會自動進行部署操作,將更新的Blog內容更新到repo的master分支中,實現Blog的持續集成,自動部署。
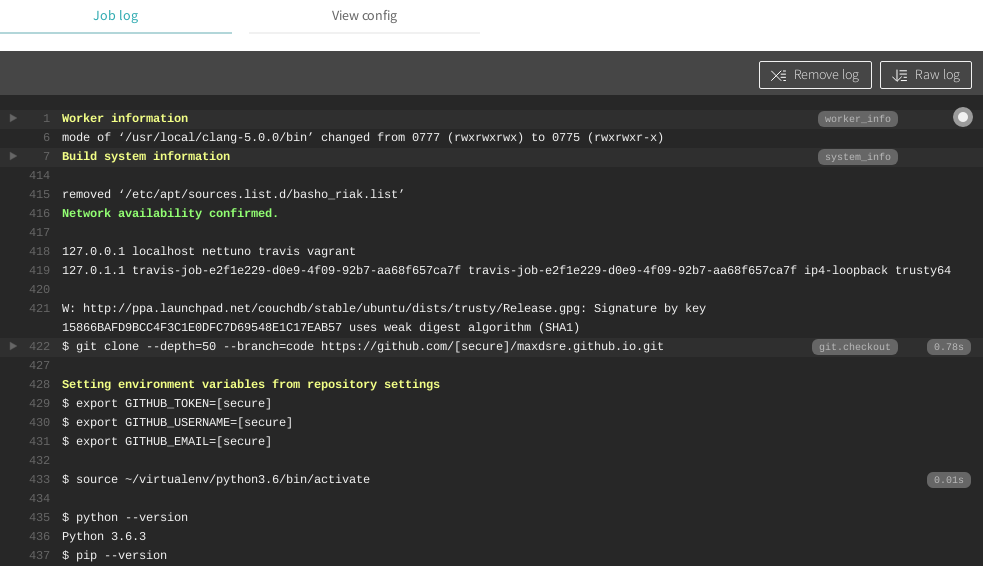
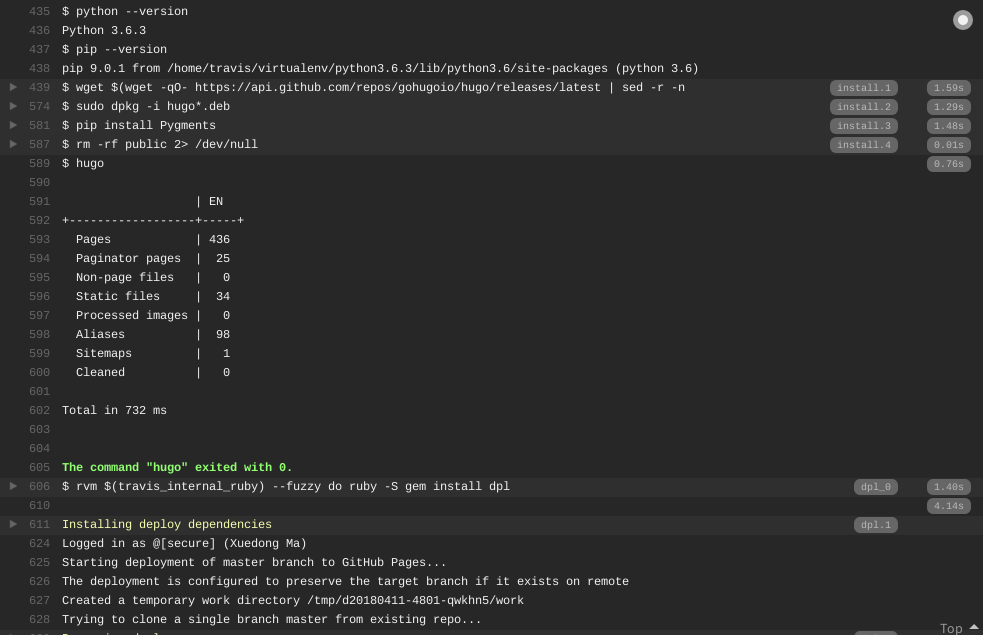
部署過程日誌
